
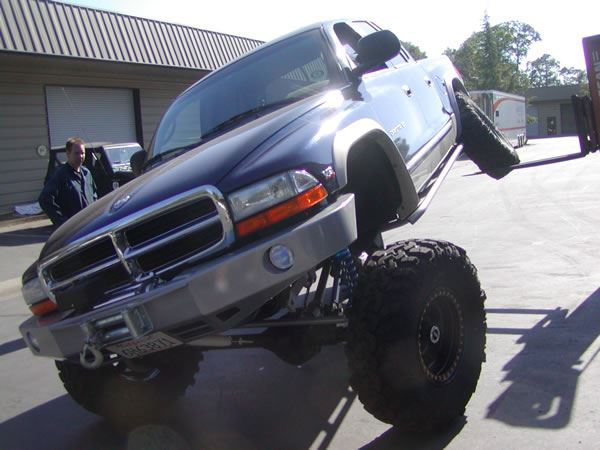
2000 Dodge Dakota
2000 Dodge Dakota
Vehicle Stats:
Vehicle: 2000 Dodge Dakota
Engine: 300 V-8
Transmission: 4 Speed Auto
T-Case: 231 HD with 4.0 Klune-V
Axles: High pinion 44 front, 32 spline 60 rear
Tires: 36" x 17 x 13.50 Iroc Radials on Allied Bead Locks
Suspension: King Coil-Over front with 4 link, Spring over rear with torque arm
This Dakota project all started when Jamie donated his Apple IIE computer to the non profit Foundation for Battered Husbands. Apparently he was at the top of the technology wave when he bought his computer in 1983. However, the IIE just wasn’t able to sustain today’s high speed internet connections. Jamie finally bought a new computer.
The new computer opened up all sorts of windows that he wasn’t even aware of. For example, he was now able to join the Kid Rock fan club. Not to mention, he no longer needed to have his subscription of “Swank” magazine sent to his buddy Tye’s house. He could access anything he wanted to on his new high speed internet connection. In fact one day he was doing a search for “With Foreign Objects” when he typed WFO into Google. When The WFO website came up, Jamie was a little disappointed. He decided to check it out anyway, and liked what he saw.
Back at the shop, Beau answered the phone and started talking. I could tell by the questions he was answering that it was someone wanting to do a straight axle swap. We get a lot of that type of phone call, but most of the people never follow through. After Beau hung up the phone, he relayed the info to Phil and me about a straight axle swap in a Dodge Dakota. It sounded like a great project! In a few days, we got the go ahead from Jamie. His only request was to have a truck that he could drive around and feel as “Whiskey Tango” as possible while he blasted the song “Cowboy” by Kid Rock.
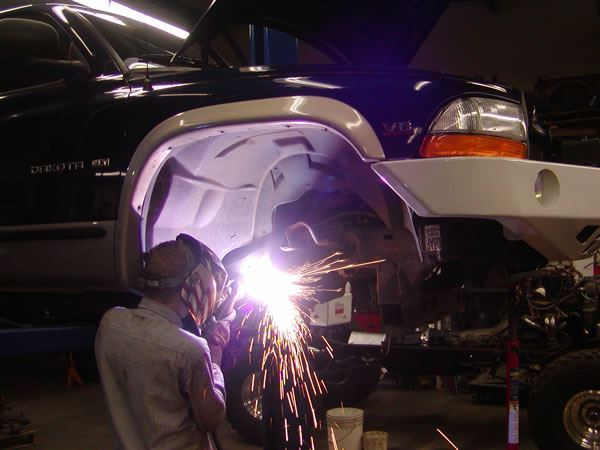
The first day is always the most fun. After Phil did one last burnout, we let him do the honors with the plasma cutter! Parts started falling off in a shower of sparks! By the end of day, the front suspension was laying on the floor, along with the rear axle, and transfer case. The fun was over. It was now time to start grinding. Beau was taking measurements and starting to draw up the suspension, while I was conveniently taking a phone call or something. Phil was stuck to do the grinding.
The main goal on the design of this truck was to make a truck that looked like a Lion, drove like a kitten, and climbed like a mountain goat. A typical day for this truck would be to take your garbage to the dump, and then hit Rubicon on the way to a wine tasting party on the Tahoe shore. You might tip the valet an extra $5 to fill the tires back up with the on-board air compressor.
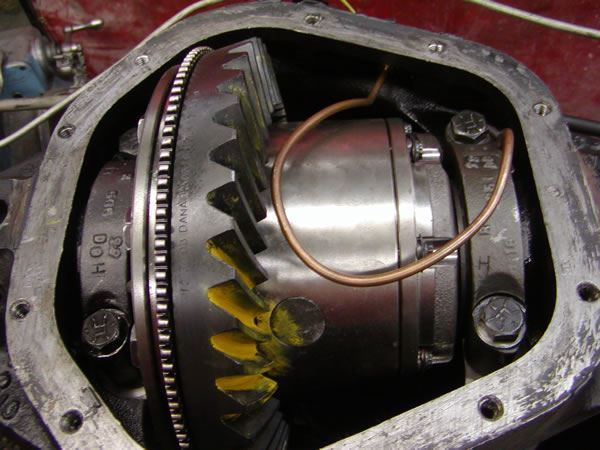
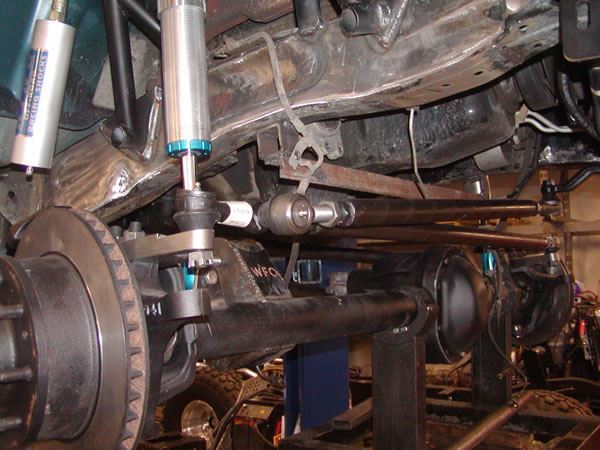
The three of us had already decided that a parallel 4 link with a track bar would be a good design for the front suspension on this truck. We wanted it to drive as smooth as possible, but still have off-road capabilities. For the front axle, we chose to use a high pinion 44 from the front of a 78 F-250. This is a core axle that we like to use a lot. It was only available in 78 and 79, so it is hard to find. It comes factory with flat-top knuckles, dual piston disc brakes, 3” axle tubes, and a heavy cast housing. We replaced the axle shafts with Yukon 4340 alloy axles, and OX u-joints. The entire axle was completely stripped, sand blasted, and re-built. A set of Sierra 4.56 gears was installed, as well as an ARB Air Locker.
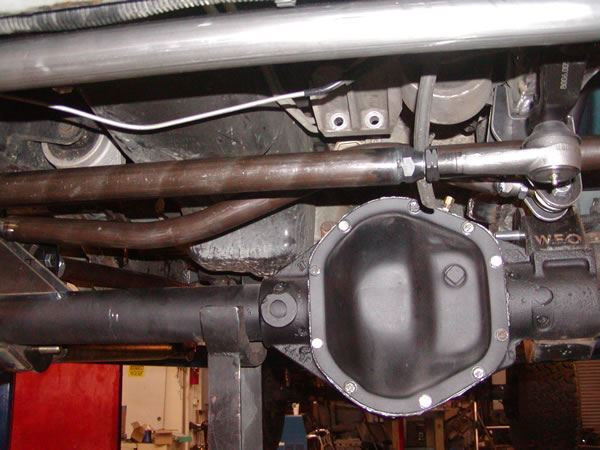
In the rear, we chose to use the elusive Ford Van 60 rear. We found our rear 60 in a 1999, E350, 2wd van. It was a full floating, factory disc brake, 32 spline, Dana 60 rear. This used a mechanical e-brake on the inside of the rotor hat. Another bonus was that it already had a tone ring and speed sensor on the ring gear. We dropped an ARB Air Locker in it, and a set of OEM Spicer 4.56 gears. We made sure to re-use the ring gear tone ring to help us set up our speed sensor later.
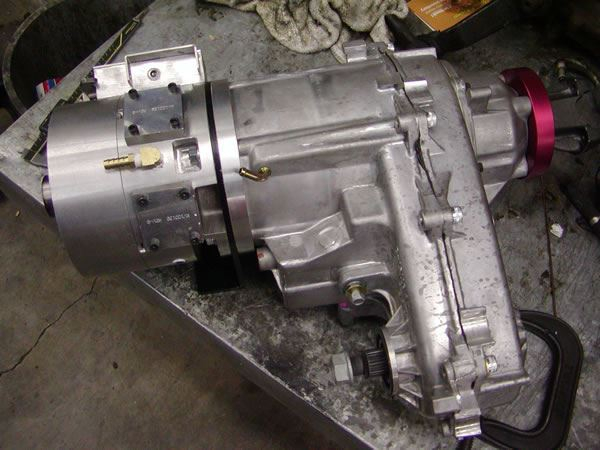
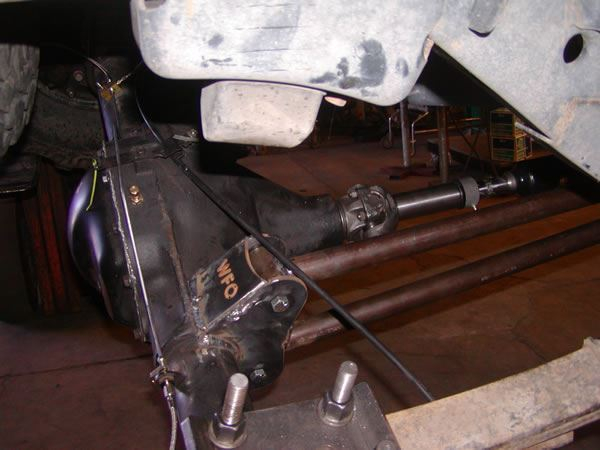
After building the axles, it was time to decide what transfer case we were going to use. The factory full-time NP242 transfer case was already in the scrap pile. We knew we wanted to be really low geared for Rubicon, but we also knew that Jamie wanted the option to bomb through mud and snow. We ended up deciding on a Klune-V and an HD 231 transfer case. We went with the 4.0:1 “David” Klune-V. This allowed us to have 3 low gear options for all different types of terrain. We could have 4:1, 2.7:1, or 10.8:1. The small size of the 231 allowed us to clock it up enough to have a completely smooth Belly pan. We didn’t want anything hanging below the frame rails.
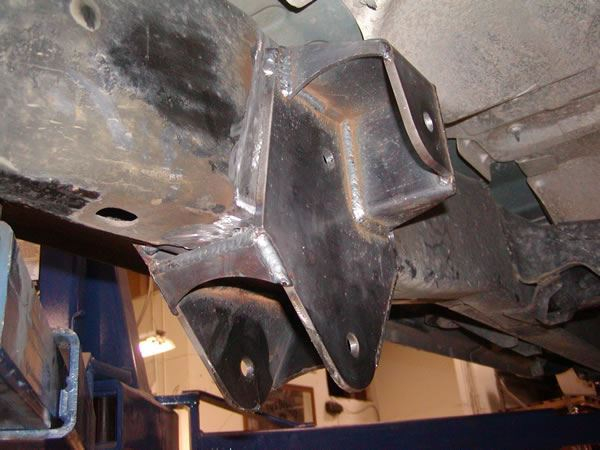
As Beau was designing the suspension, he was trying to keep the truck as low as possible. This made his work extremely tough. There was not a lot of room to fit all of the suspension links, and still allow the suspension to have good up travel. By bending the upper links around the frame rails, and making a bent track-bar, he was able to come up with a fairly low profile design.
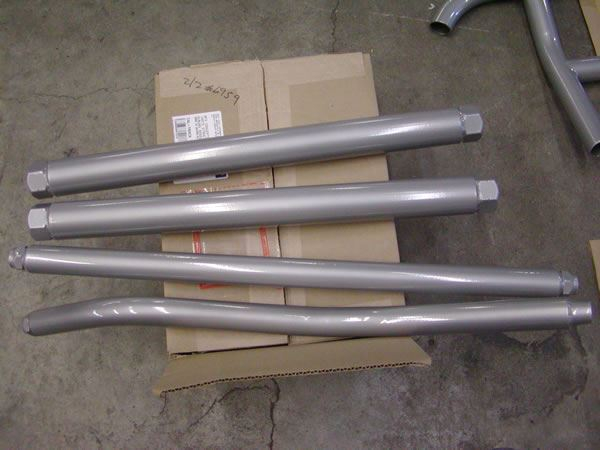
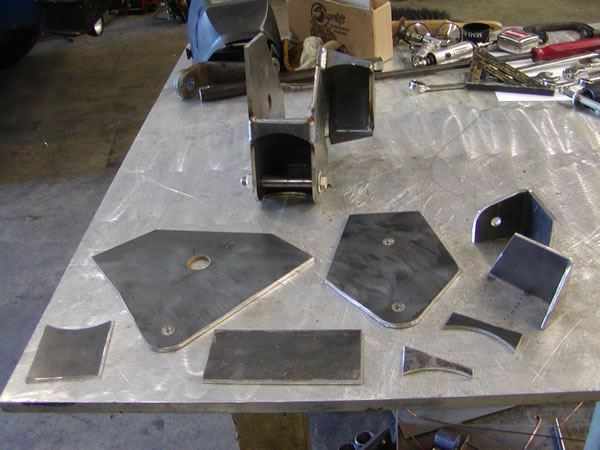
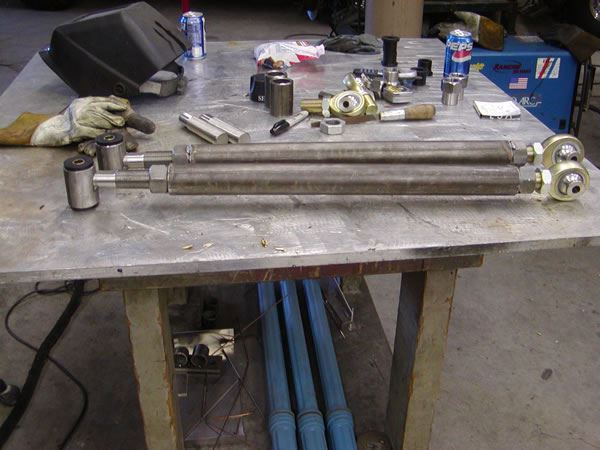
After the design was finished, all of the brackets and mounting tabs were waterjet cut from 1 / 4 inch plate steel. As Beau began assembling the pieces of bracketry, Phil built the links. The lower links were built from 2”x.250 wall DOM tubing. The upper links were built from 1.5”x.219wall DOM tubing. 1 1/4 inch heim joints with high mis-alignment spacers were used at the axle ends of all links. At the frame end, rubber bushings were used. The upper links were drilled and tapped on the lathe, while the lower links used WFO weld-in inserts. The track bar was built from 1.5” DOM, and used 3/4 heim joints at each end. It was custom bent to clear the oil pan and differential at full compression.
The next order of business was the steering. We knew Jamie would be too busy with his music and beverages to worry about the rocks he was going over. Due to this, we decided to go full high-steer.
The factory Ford flat-top knuckles were machined. WFO high-steer arms were used, along with a 1.5” DOM heavy duty tie-rod and draglink. A stock TJ/YJ pitman arm was drilled and reamed out to fit the large Chevy tie-rod ends.
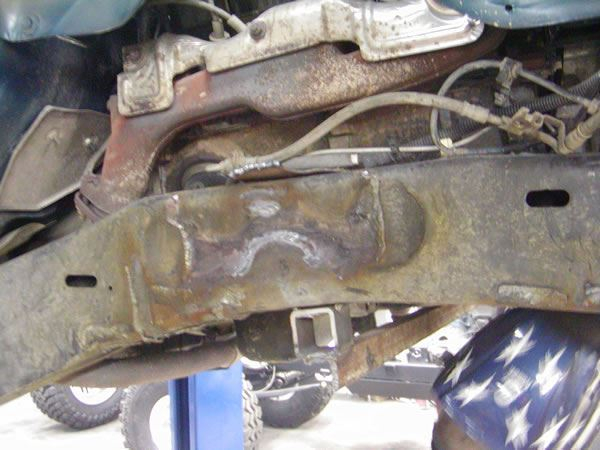
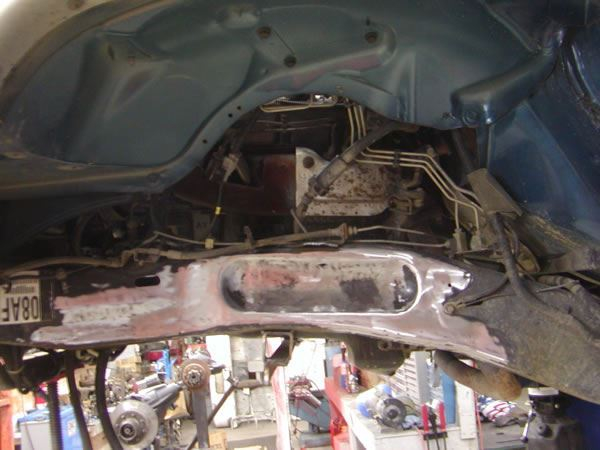
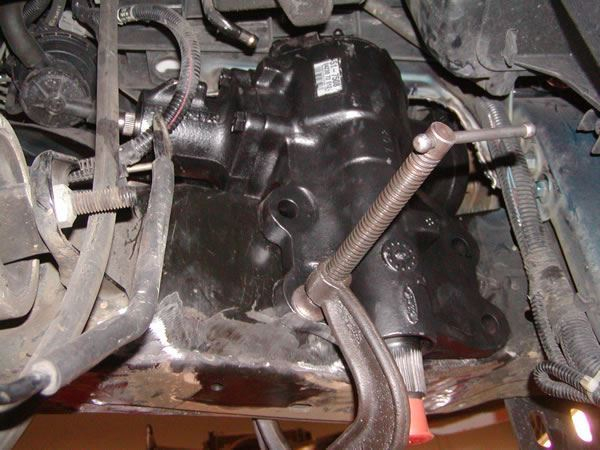
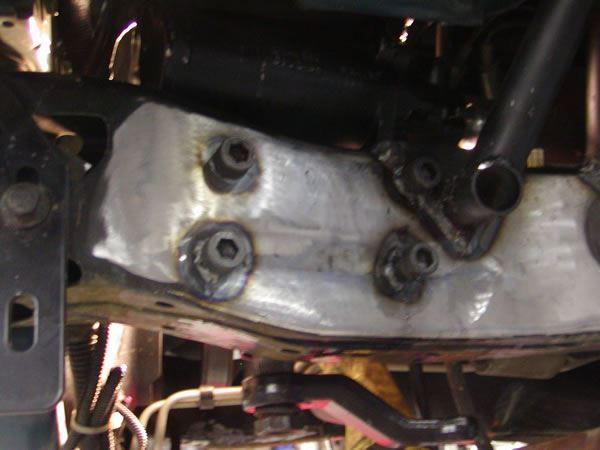
Due to the fact that the truck was originally rack and pinion steering, we also had to add a power steering box. Our first thought was to use a standard Saginaw box and mount it on the inside of the frame. However, we wanted to get the draglink as long as possible. We decided to use a 78-79 Ford F-250 box instead. The advantage of this box was that it sat on top of the frame rail, instead of on the inside. This gave us a few extra inches on our draglink. After we got the box where we wanted it, we drilled the frame rails for the bolts, and welded sleeves into the frame. Custom power steering lines were made to link the existing pump to the new steering box.
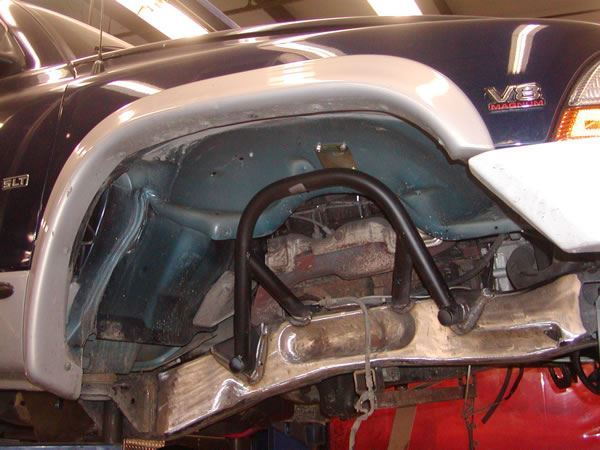
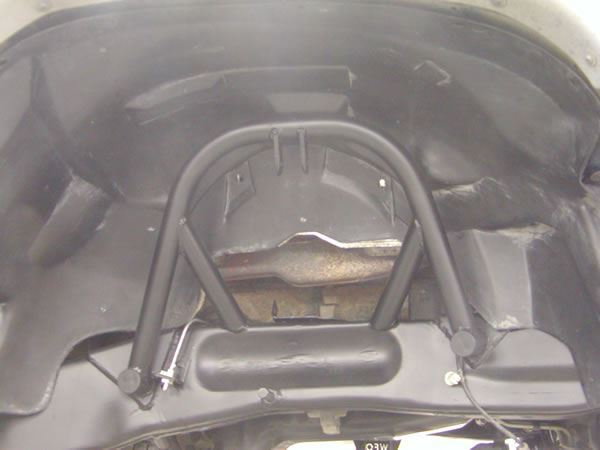
When it came down to shocks, we decided to use 2.5” King Coil-overs. Once we mocked up the front axle and found our desired ride height, we built our shock towers. The towers were built from 1.5”x.120 wall tubing, and welded to the frame. We were able to fit them in tight enough to keep the stock plastic inner fender wells. Due to the fact that everything was so tight, we determined that a 10” travel shock would be perfect. After measuring the un-sprung weight at each corner, we called King and ordered the shocks.
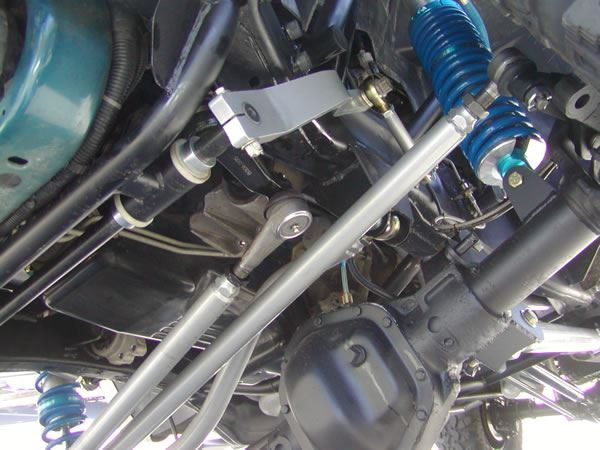
With coil over shocks and a true 4 link, it was obvious that we were going to need a sway bar. We called up Speedway Motors, and ordered a sway bar kit. The sway bar fit across the front of the frame rails, and was attached to the axle using 3/4 inch heim joints. The drivers side arm had to be custom bent in order to clear the pitman arm at full steer. We also used large cotter pins in order to allow for a sway bar disconnect when the truck hit the trail. The sway bar links were easily pinned up and out of the way, when disconnected.
The next order of business was rear suspension. We decided to keep it simple and use the factory rear springs. They were nice and soft already. While Beau designed a set of shackle flip brackets, Phil hooked up the e-brake and speed sensor. With a little grind work, the factory Dakota speed sensor bolted right into the new rear axle. The e-brake cables were just as easy to hook up. With the help of a Locar cable kit, and an internal spring under the dash, the e-brake was working great.
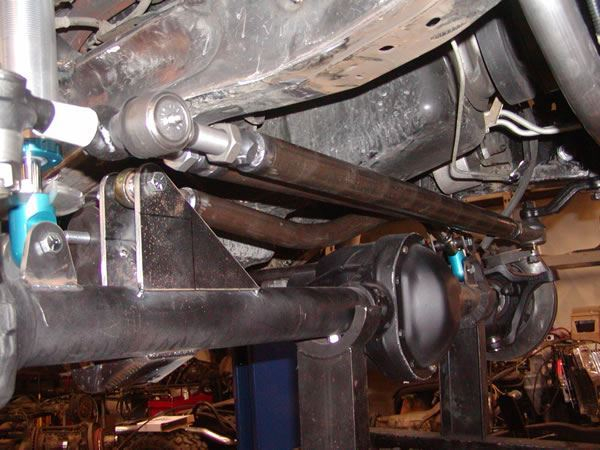
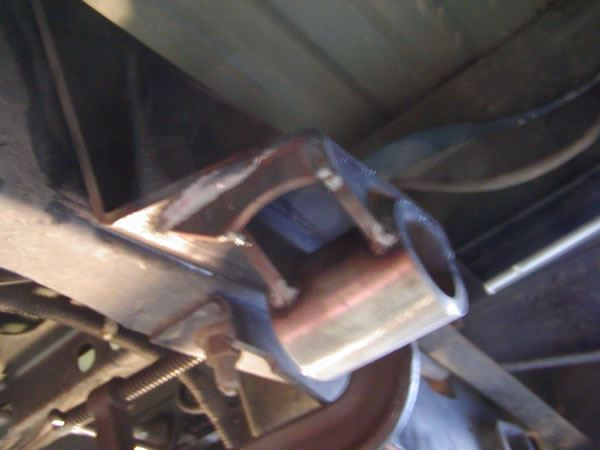
After the shackle flip brackets were welded together and installed, a 3” block was added to achieve our desired ride height. With a tall block on such soft springs, we new were going to need a torque arm. It was obvious that axle wrap would be a problem. Beau drew and cut out a bracket to weld to the axle tube while Phil built some new cross-members to hold both the torque arm and belly pan. A Rubicon Express Super Joint was used at the upper end of the torque arm, along with a shackle. Poly bushings were used at the axle end of the two 1.5”x.219 wall DOM tubes. The lower tube was attached to the upper tube with a heim joint, in order to allow pinion angle adjustment.
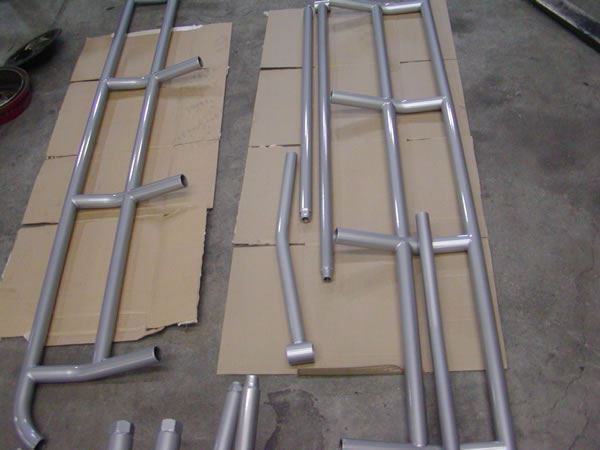
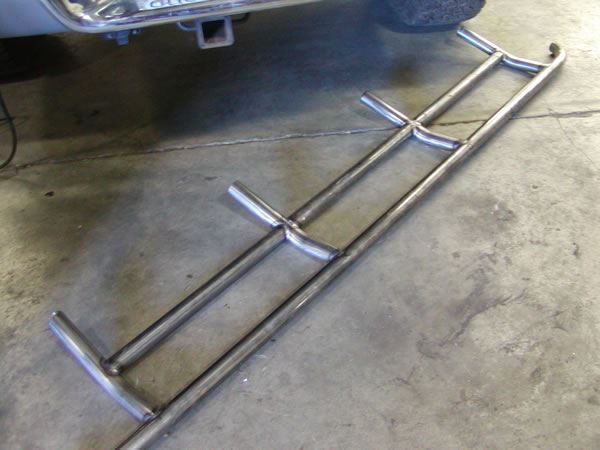
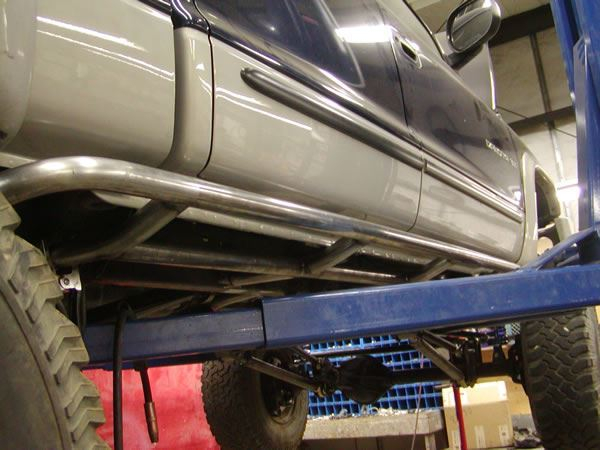
The last thing to address was rocker protection. Phil and Beau pulled the bender out and built some full length sliders from 1.5”x.120 wall tubing. All parts were then prepped and sent out for powder coating. In the meantime, both drivelines were ordered from Tom Woods Custom Driveshafts. The front driveshaft was kept pretty simple. It was built with the new 1310 high clearance superjoint at the transfer case end, and a standard 1310 u-joint at the axle end. In the rear, a 1350 CV shaft was built, and coupled to a Tom Woods 32 spline CV flange.
While we waited for the parts and driveshafts, we decided to focus on the front speed sensors. We wanted to make sure the OEM anti-lock brakes would still work. Not to mention, we didn’t want to give the truck back to Jamie with warning lights flashing on the dash. Beau designed a special tone ring that we attached to the front hub assembly. The new tone rings were designed to match the rear sensor. We were able to re-use the OEM speed sensors, and hook the system back up.
As soon as the parts came back from powder coat, the truck was assembled for the final time. The sliders were welded to the frame, while all other parts were assembled and bolted on. The 3/16 thick, full belly pan, was bolted on with tapered allen head screws, so they wouldn’t drag on any rocks. The ARB pump was wired in, and the switches were installed in the center console. We were a little behind schedule, so Jamie was already on his way up to test drive his new truck. We didn’t have much time to mount the 36x13.50x17 Iroc Radial tires on our 17x9 allied bead locks. We were just finishing torquing down the bead locks and flexing it out when Jamie showed up.
Jamie was really excited about his truck. We hadn’t even showed him any pictures. It was all a surprise to him. While he was crawling underneath it, we were anxious to get it out somewhere. We were pretty confident in our build, so we threw a curve ball at him. We decided to go straight up to the Fordyce trail. Phil’s Toyota and Beau’s jeep were sitting in the parking lot, ready to go. Without a single test drive, Jamie and I jumped in his Dakota and headed out to the freeway. It seemed to drive great!
We stopped at a gas station to fill up, and get some beer. While Jamie was pumping the gas, I noticed gear oil coming from under the truck. The Klune-V was leaking! After a quick trip back to the shop, the drain plug was re-sealed, and we were back on our way.
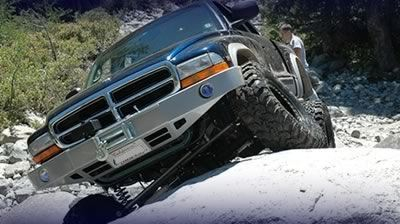
We were at the trail in an hour. Jamie locked the hubs while I aired the tires down to 10 lbs and disconnected the sway bar. We quickly made our way up “Driveline Hill” and down to the first river crossing. The truck made the trail too easy! As Beau and Phil kept going, we turned around so Jamie could get home. We drove out from the River without touching the air lockers. The suspension was so soft, that all 4 tires were always getting traction.
As everyone knows, a truck is never done. Jamie already has some new ideas for us. In a few months, he will be back for a new rear bumper, hydro assist steering, rock lights, CB, and a Kilby on board air compressor.
Like what you see and want your ride to look similar?
You can purchase the exact setup. Contact one of our WFO build experts to get more information on this setup for your vehicle. Click here to contact an expert today.